One of the best things about professional photography sessions is that you can transform your home into a beautiful work of art, where the walls are filled with loving memories of your family. But not everyone knows that the first step to creating the perfect gallery wall is capturing proper photos of your walls. At Fresh Light Photography, we use these images of your wall to digitally design custom wall galleries that beautifully showcase your family memories.


Now that you know the importance of the photos of your walls for the design of your wall art, let’s talk about how you can click these photos correctly.
Choose the Right Wall
Before you start snapping away, take a moment to think about which wall you want to use for the art. Look for a space that:
- Has good natural lighting
- Is free from clutter
- Offers enough room for a statement piece or gallery arrangement
- Reflects your personal style and the room’s purpose

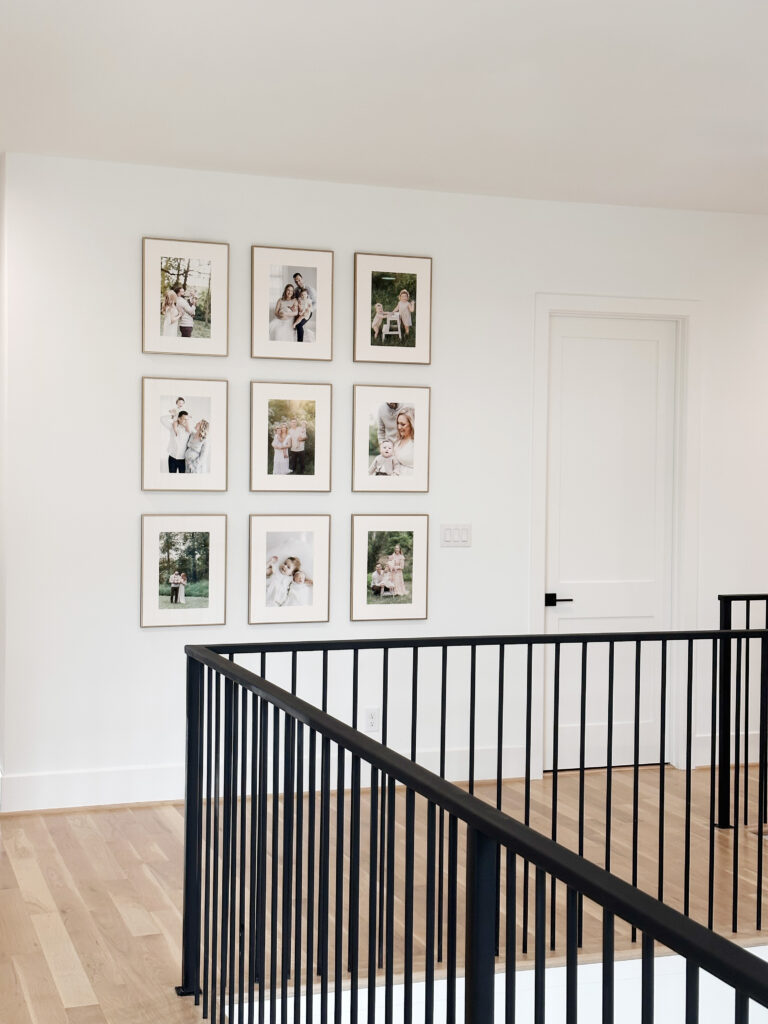
Since the wall you choose will be the backdrop for your cherished family portraits, pick a spot you’ll enjoy seeing every day.
Prepare Your Wall
Once you’ve selected the perfect wall, it’s time to get it photo-ready:
- Clear away any furniture or decor that might obstruct the view.
- Make sure the wall is clean and free of marks or smudges.
- If there are any fixtures like light switches or thermostats, note their locations.
Use a Reference Point
To help us accurately gauge the size and scale of your wall, we need a reference point in the photo. You have two easy options:
- Use the sticker provided in your welcome box from Fresh Light Photography.
- Take a standard sheet of paper and tape it to the wall.
Place this reference item at about eye level on the wall you want to photograph.
Set Up Your Shot
Now it’s time to capture the perfect photo of your wall:
- Use a smartphone or digital camera in landscape orientation.
- Step straight back from the wall as far as possible.
- Aim to include as much of the surrounding area as you can in the frame.
- Keep the camera level to avoid distortion.
- Ensure there are no harsh shadows and lighting must be uniform.
If you’re photographing a narrow space like a hallway or staircase where you can’t step back far enough, don’t worry. In these cases, simply measure the available space and make note of any obstacles like light switches or thermostats.
Take Multiple Shots
It’s always better to have too many photos than not enough. Take several shots from different angles and distances to give us plenty of options to work with. This will help ensure we can create the most accurate and appealing design for your space.
Send Your Photos
Once you’ve captured your wall photos, it’s time to share them with us. Send your images to our team, and we’ll use them to start designing your custom wall gallery. Our experienced designers will work their magic to create a layout that perfectly complements your space and showcases your family’s precious moments.
The Power of Professional Design

By following these simple tips for photographing your walls, you’re taking the first step toward creating a stunning display of family memories in your home. At Fresh Light Photography, we understand the importance of preserving and showcasing life’s most precious moments. Our team of experts will use your wall photos to design a custom gallery that tells your family’s unique story.
Remember, great wall art starts with great photos of your space. By taking the time to capture clear, well-lit images of your walls, you’re setting the stage for a truly personalized and beautiful gallery that you’ll cherish for years to come.
So grab your camera, find that perfect wall, and let’s start creating something beautiful together. Your dream gallery wall is just a few photos away!
add a comment
+ COMMENTS